Learn How to Recreate this Landscape Axon!

This month we will be sharing content emphasizing ways to use summer to develop yourself. If you are a professional, summertime may not be the same, so we hope you can still utilize these while juggling everything else! We understand it may be difficult to juggle life, friends, and honing one’s craft, so please plan out your goals to avoid burning out!

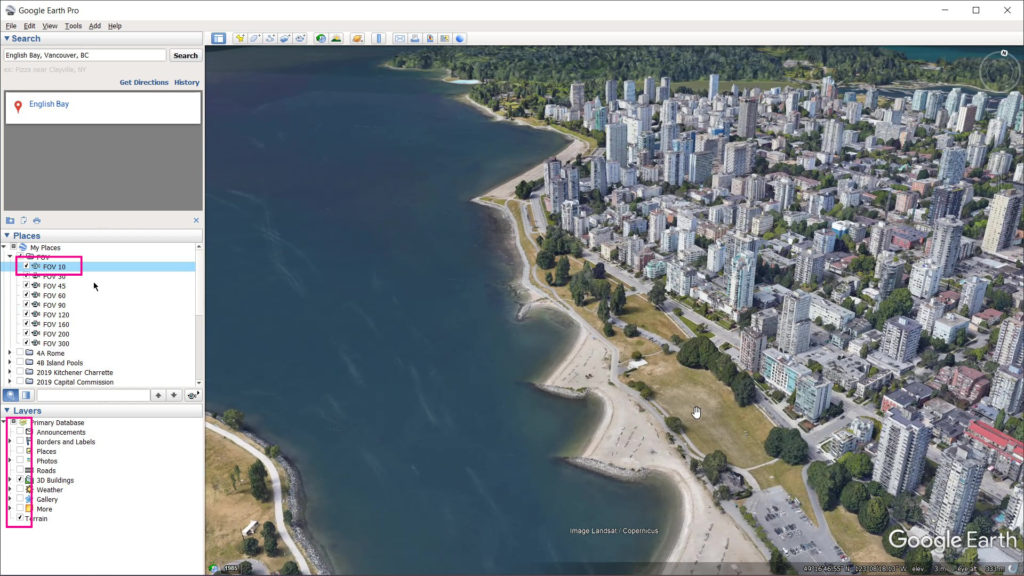
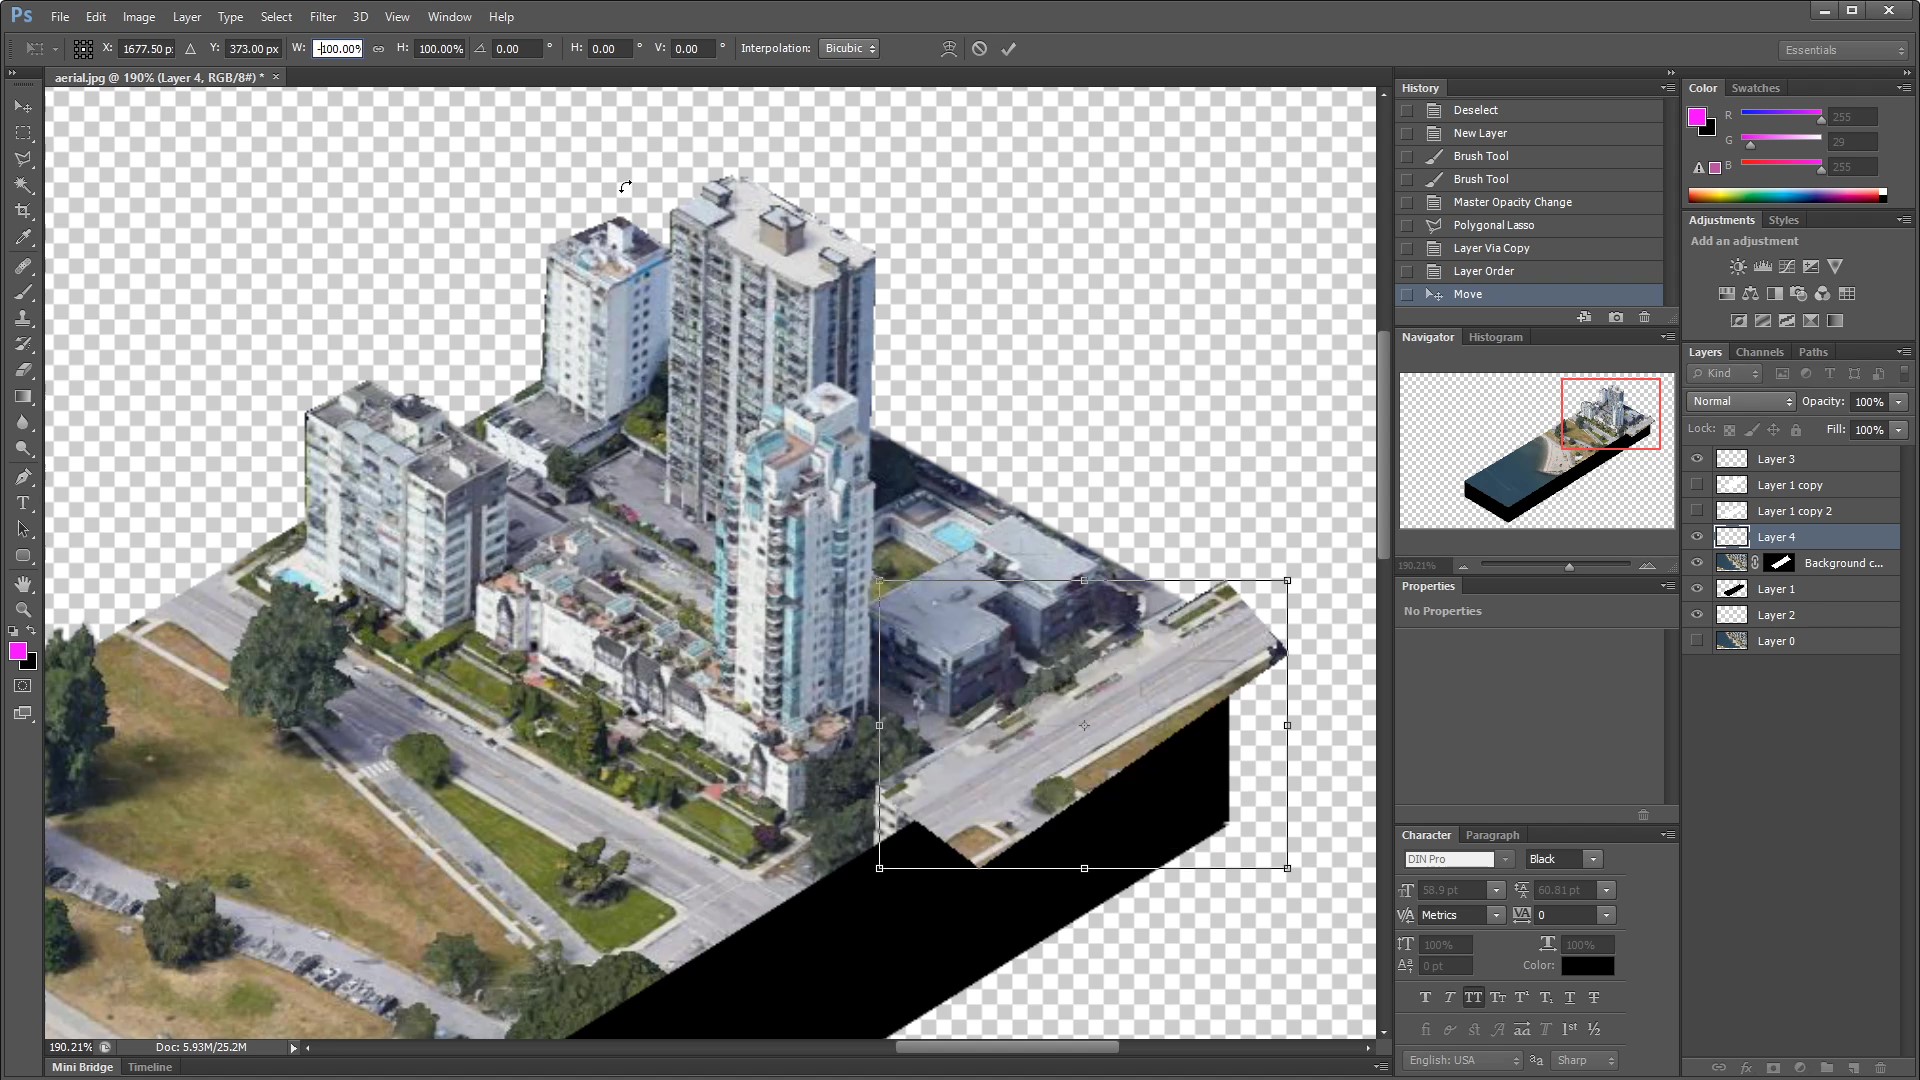
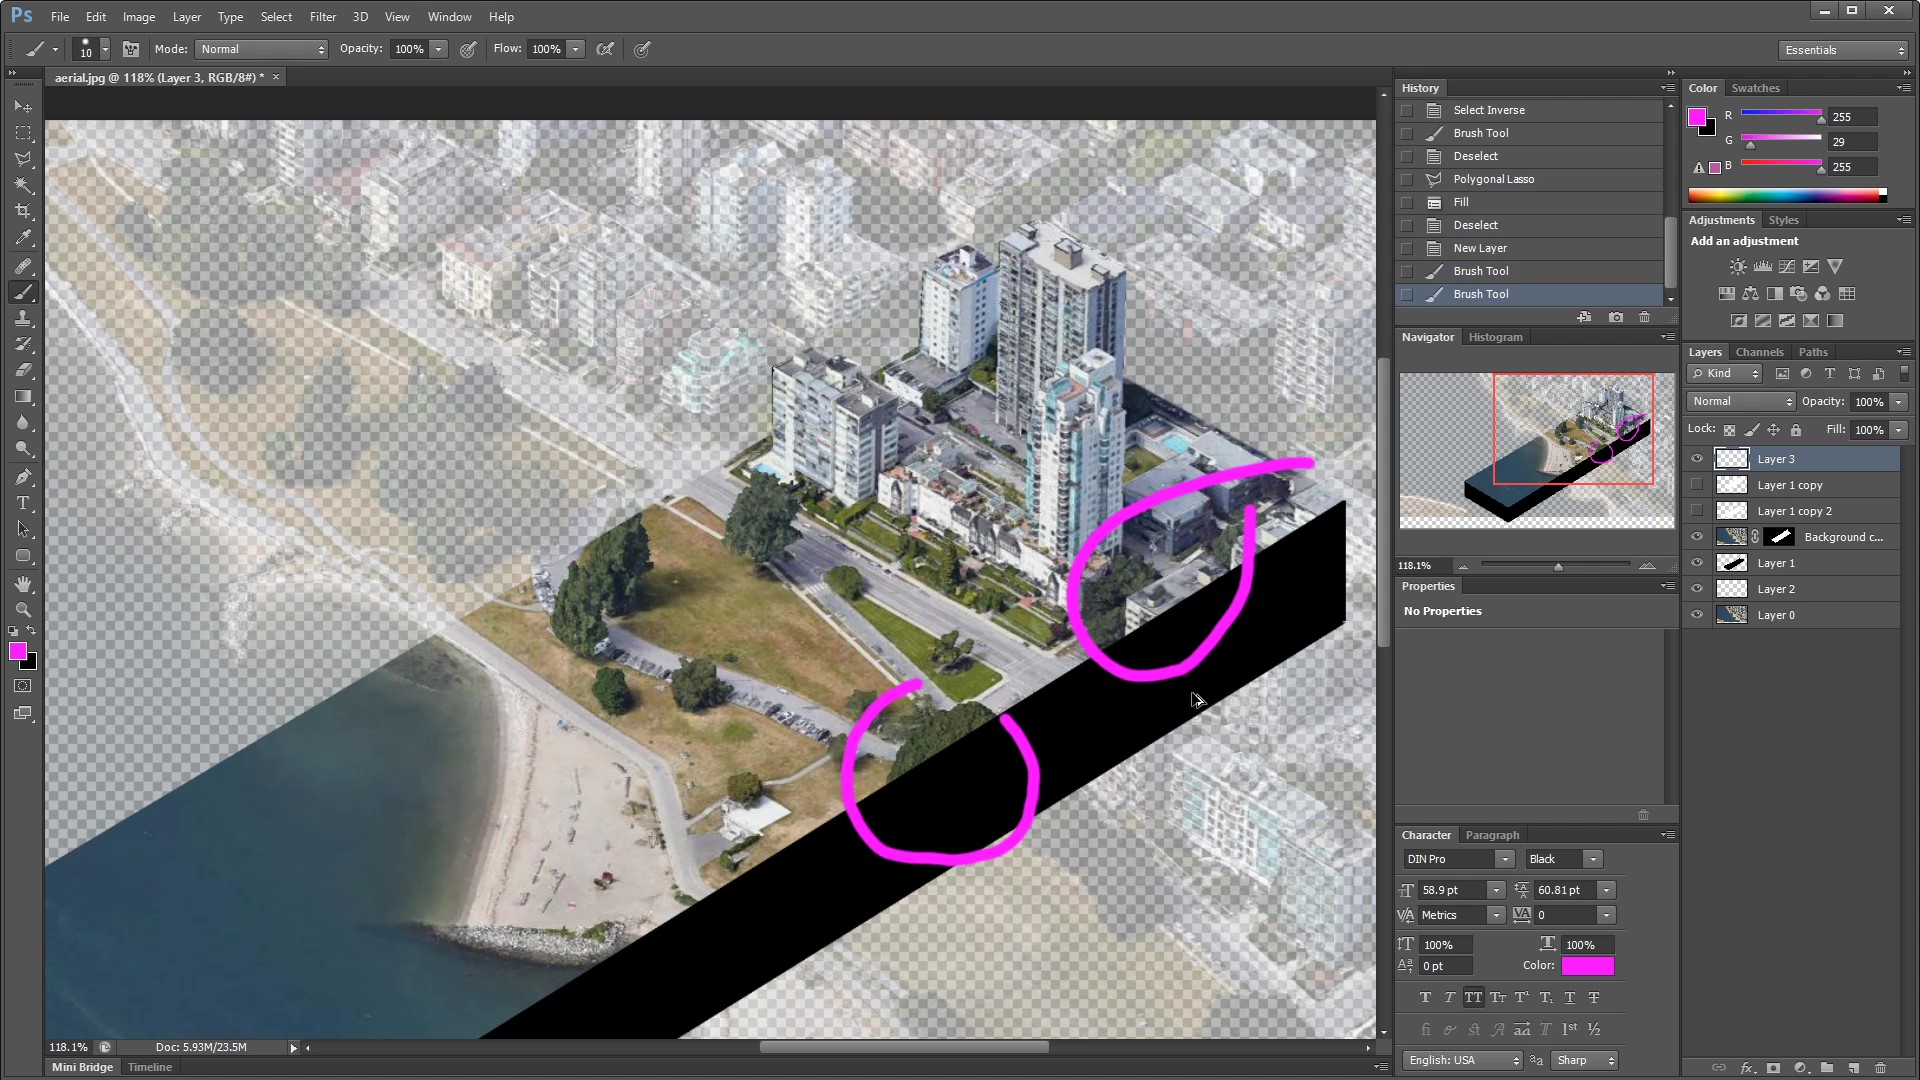
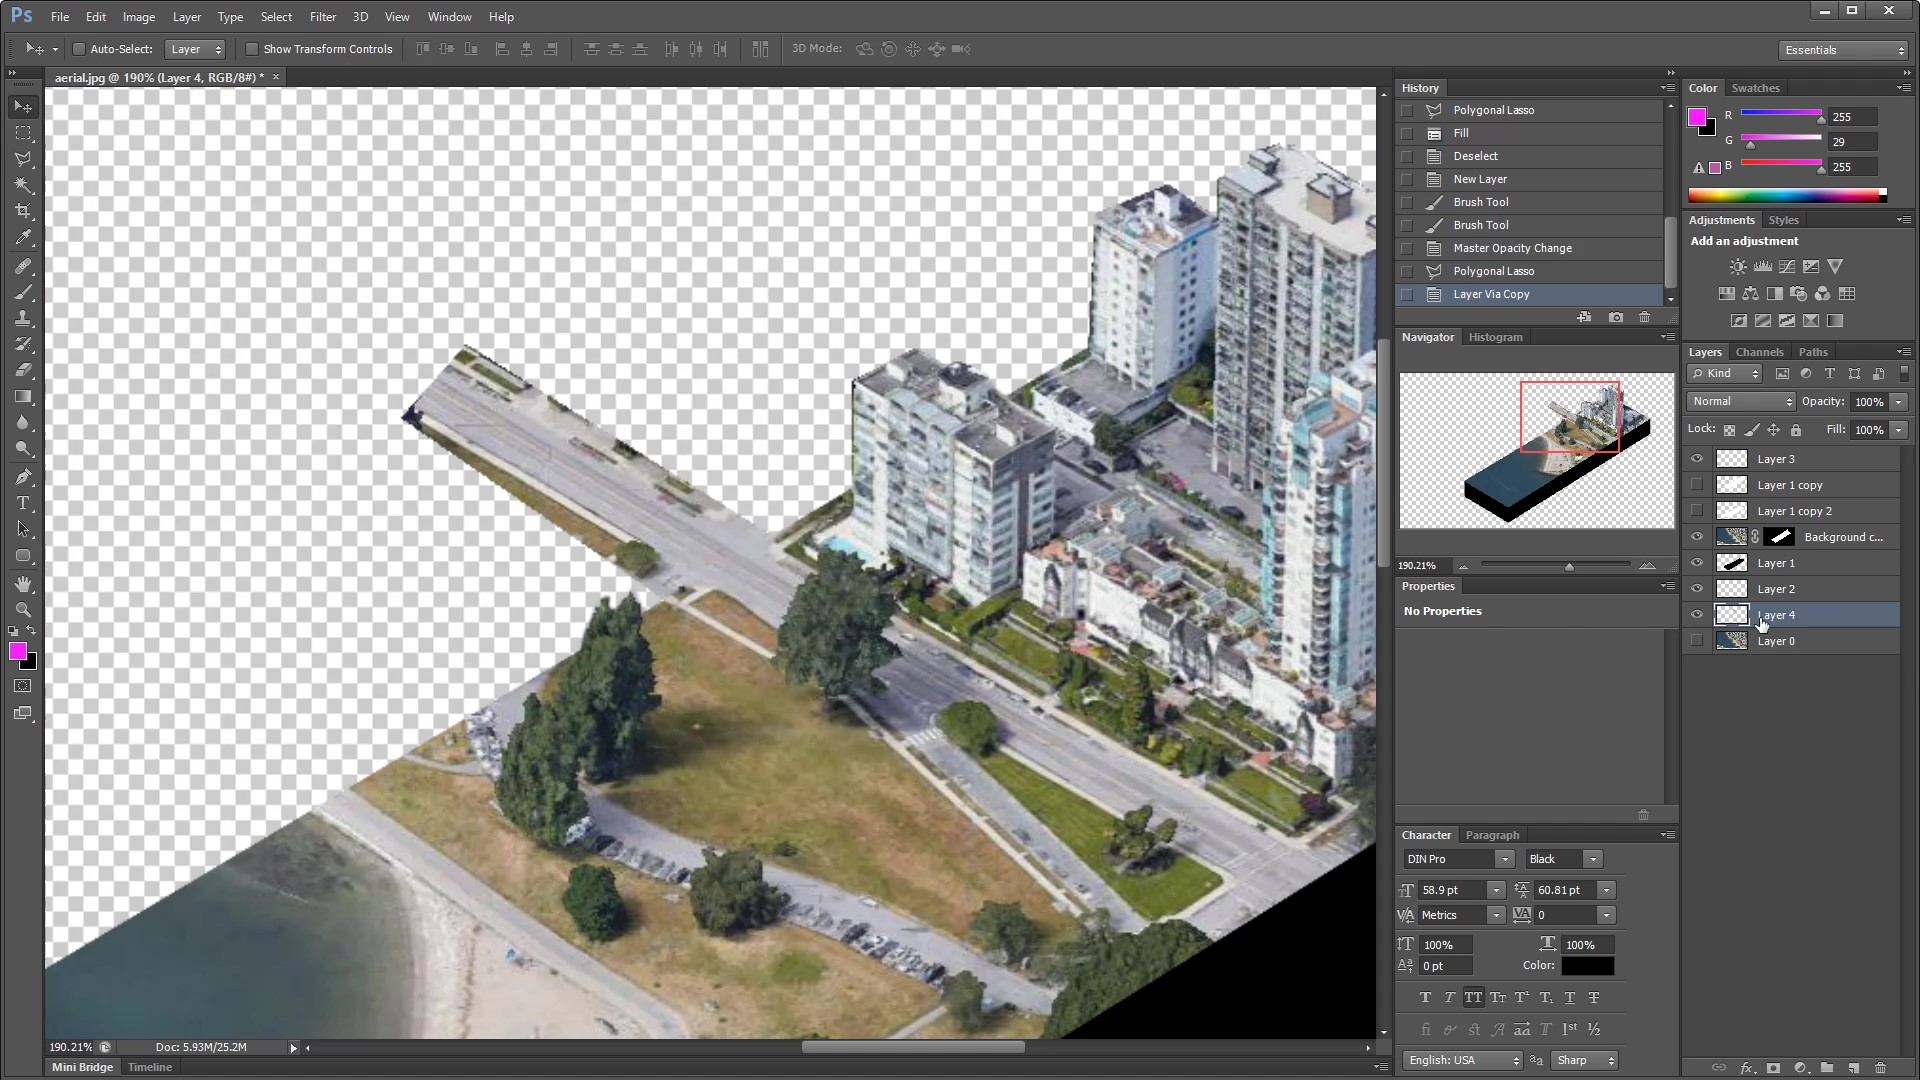
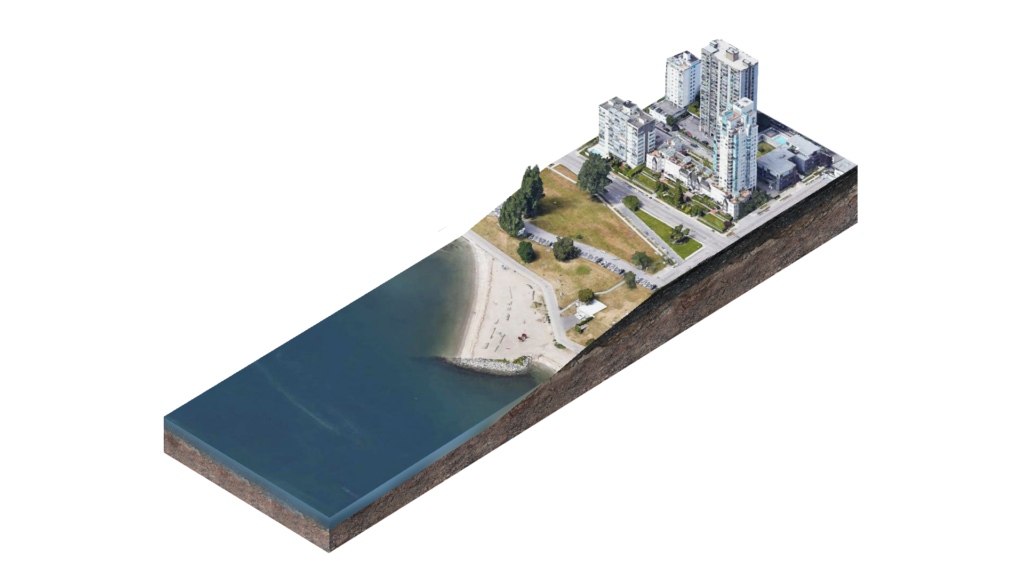
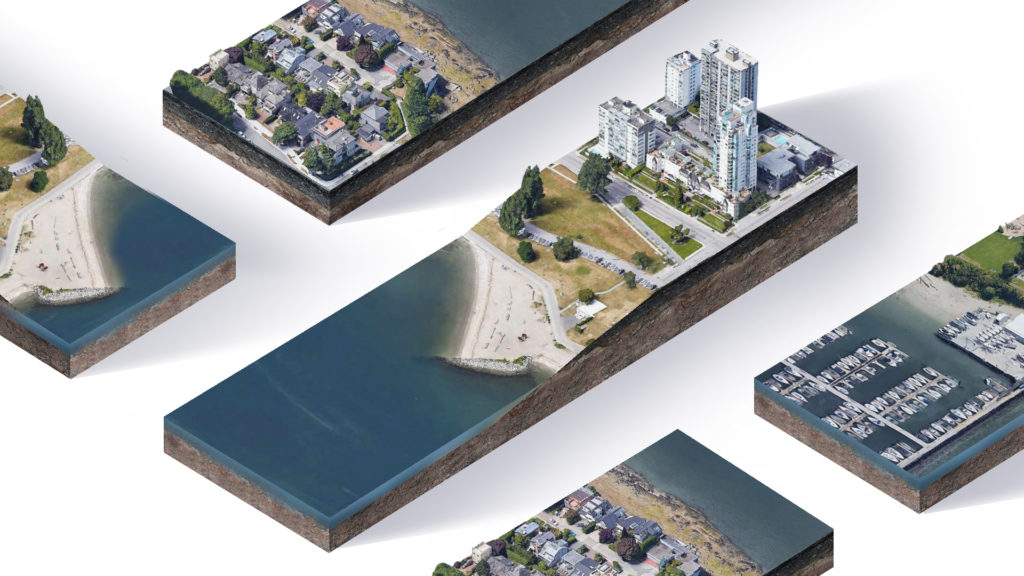
Today’s article will be breaking down how to recreate this landscape axon so that you can have this in your arsenal of skills. This particular axon is another great way of illustrating the relationship between the landscape, your project, and the context in a semi-isolated view compared to a full aerial render. It’s important to note that we are using Google Earth Pro and Photoshop. However, there are alternatives that you can use besides photoshop, which will have similar processes.

Step 1 : Getting The Appropriate Software

We are assuming that you have access to Photoshop already; however, if you don’t, a healthy alternative I use is Affinity Designer. Once you have either of the software, you’ll want to get Google Earth Pro and the FOV set to achieve this graphic image.

Step 2 : Apply the FOV to Google Earth Pro

Once you’ve installed Google Earth, you can open the FOV files to apply the changes. Change field of view to 10 degrees to get as close to parallel perspective as possible. Navigate to your project site and orient your camera, and remove unnecessary signs and markers.

Step 3 : Export Hi-Def Image With No Obstructions

Step 4 : Import Image into Photoshop

After importing the image to Photoshop, crop the site using a layer mask. This is the most optimal way to work to keep your workflow non-destructive! P.S.A, this will save you a lot of time in the future if corrections are needed.

Step 5 : Adding Depth

Step 6 : Restore Buildings and Trees that were cut off by the Layer Mask

Step 7 : Fine-Tuning The Image

Step 8 : Adding Finishes or Textures

Dress it up however you like! In our example below, we added some texture to the ground and water section.

Let us know how this came out for you and share it with our Instagram page by putting “#Archihacks” in the caption! That’s all we got for today! I hope you found this article helpful, and if you have any tips for future students, please let us know in the comments below. Make sure to follow our Youtube and Instagram for more content!